Password-less: use FIDO2 as smart card

In today's digital age, where security and privacy are extremely important, we are facing the task of making sure that our devices and services have secure logins. One of the most exciting areas in this context is the transition to password-less authentication, enabling users to access their systems easily and securely. Despite the challenges, we must embark on this journey and explore new technologies that help us achieve this goal.
An intriguing challenge for me was figuring out how to implement a modern login method for Windows devices using a dedicated hardware authentication technique. While smart cards have long been a traditional method of authentication, the question arises: have they become obsolete and unusable in the era of FIDO2 keys? I believe they have not, as they can still effectively cover certain user scenarios.
Using YubiKey and PIV
One of the features of FIDO2 keys is their ability to also function as a "smart card" allowing you to store your own digital certificate on them. This opens up new possibilities and enhances security for Windows device logins.
I personally use the YubiKey 5 NFC, which offers Personal Identity Verification (PIV) functionality.

Personal Identity Verification (PIV) is a set of standards and specifications for smart card-based authentication of individuals in a government or enterprise environment.
Before you can store a certificate on the FIDO2 key, several prerequisites need to be met. Among them is the installation of the YubiKey Smart Card Minidriver for Windows which is available here. Additionally, setting a PIN, PUK, and Management Key on the FIDO2 key with YubiKey Manager is necessary to securely store the certificate.

Note: I had to set the Management Key back to the default value because of SCARD_W_SECURITY_VIOLATION (0x8010006A) error while issuing the certificate.
Now that we have our FIDO2 key ready, we need to prepare Certificate Authority templates. Those of you who have used or are still using traditional smart cards are likely familiar with the "Enroll On Behalf Of..." process. The idea is that an administrator can issue a certificate on behalf of a user. For this purpose, we first need to prepare an Enrollment Agent certificate.
Preparing the Enrollment Agent Templates
An Enrollment Agent certificate is used to grant a highly privileged right to issue certificates on behalf of other individuals, including administrative accounts. This certificate must be protected very securely since it grants the high privilege of issuing certificates for others. Enrollment rights should be restricted as much as possible. Additionally, you might want to store the Enrollment Agent certificate in the TPM (Trusted Platform Module) to reduce the risk of theft, or even storing it on a FIDO2 key.
Duplicate the Enrollment Agent template on your Windows Certificate Authority Server and name it accordingly:
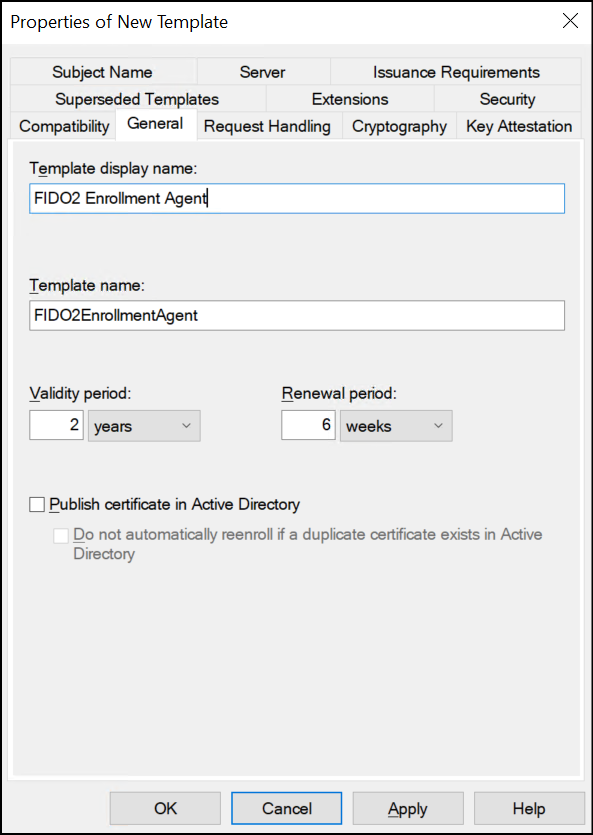
Change the Compatibility Settings to the highest operating system version:

Configure Request Handling:

Select Key Storage Provider as Provider Category and Microsoft Platform Crypto Provider to store the certificate in the TPM:

Configure Read and Enroll permissions for your privileged accounts:

Certificate must be protected very securely since it grants the high privilege of issuing certificates for others.
Use certutil -store -user My to check if certificate is stored in Microsoft Platform Crypto Provider:

Preparing the Smart Card Templates for FIDO2 key
Now that we have the Enrollment Agent certificate in place, the next step is to issue the Smart Card Template for our FIDO2 key.
Duplicate the Smartcard Logon template on your Windows Certificate Authority Server and name it accordingly:
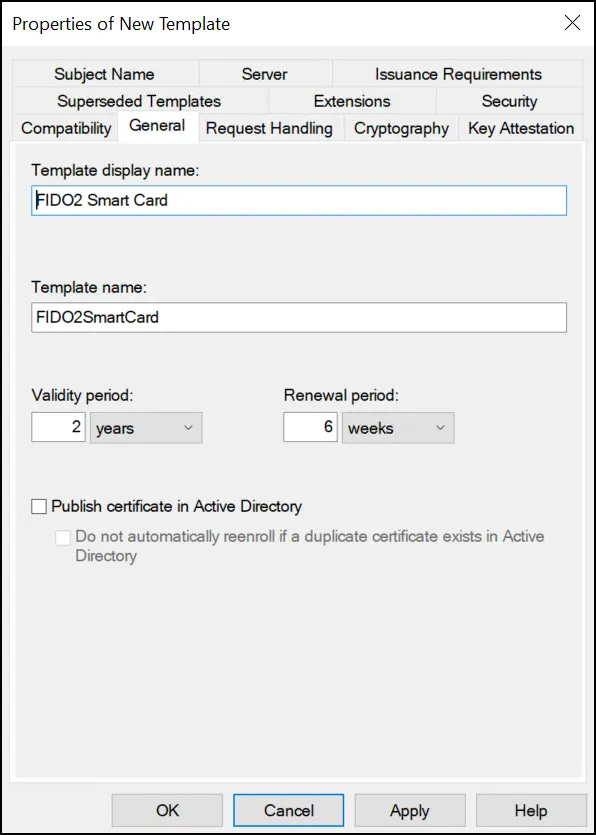
Change the Compatibility Settings to the highest operating system version:

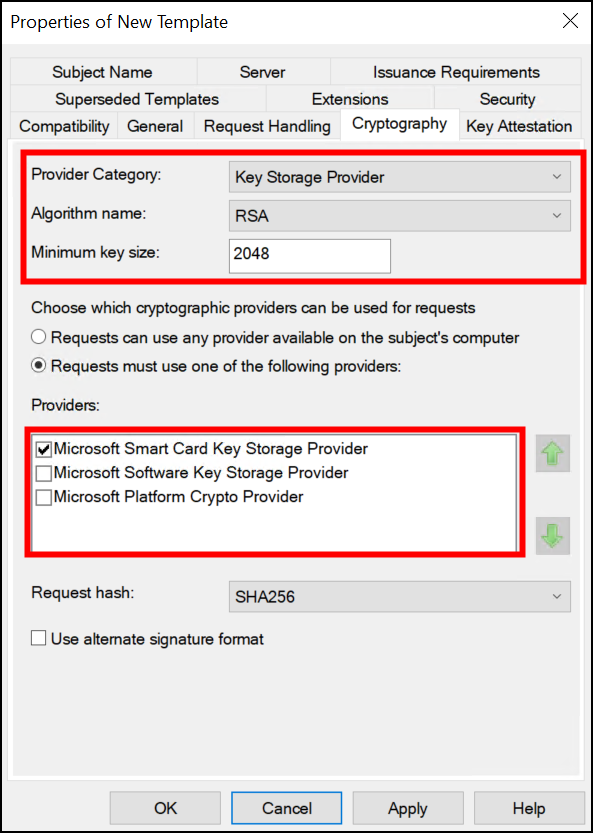
Configure Request Handling:

Select Key Storage Provider as Provider Category and Microsoft Smart Card Key Storage Provider to store the certificate on FIDO2 key:
Configure Issuance Requirements:

Configure Read and Enroll permissions for your privileged accounts:

Issuing the certificate
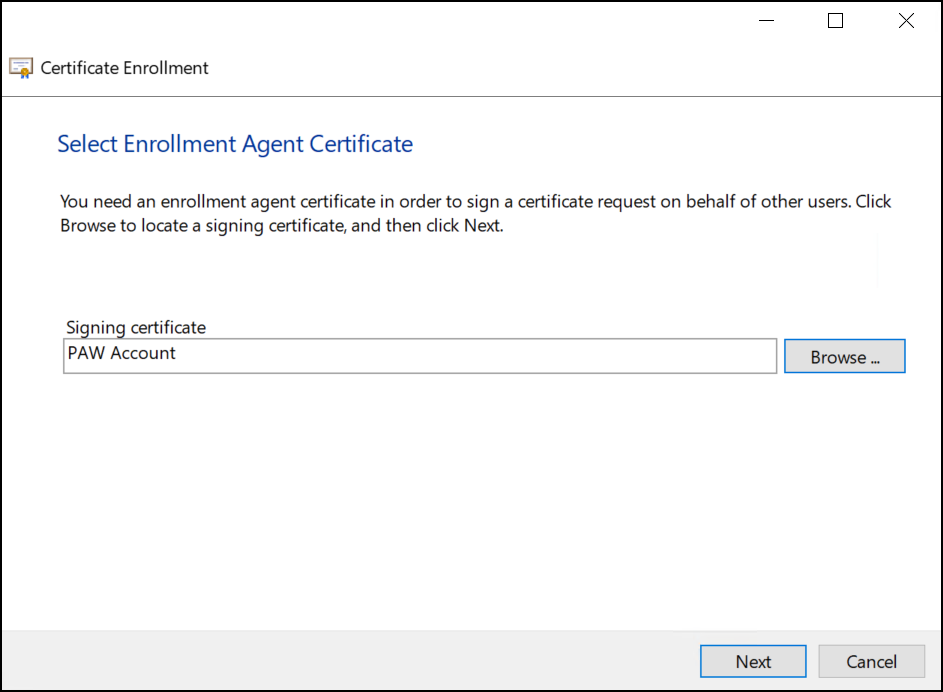
Here's how the process of issuing a certificate on a FIDO2 key on behalf of another user typically looks like:

Select the Enrollment Agent Certificate installed previously:
Select the Smart Card Template:

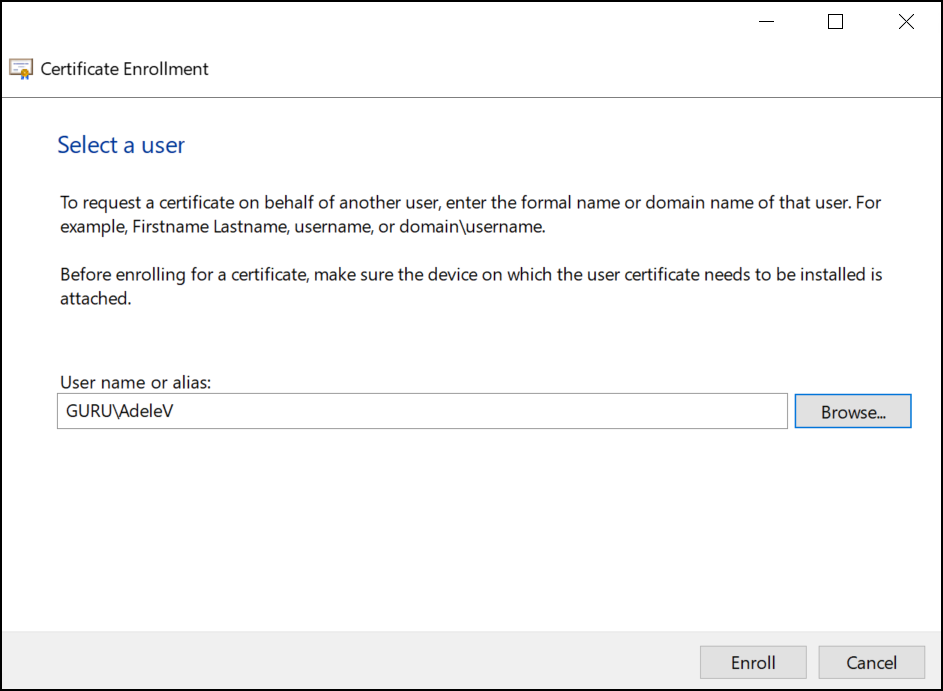
Select a user to whom you want to issue the certificate:
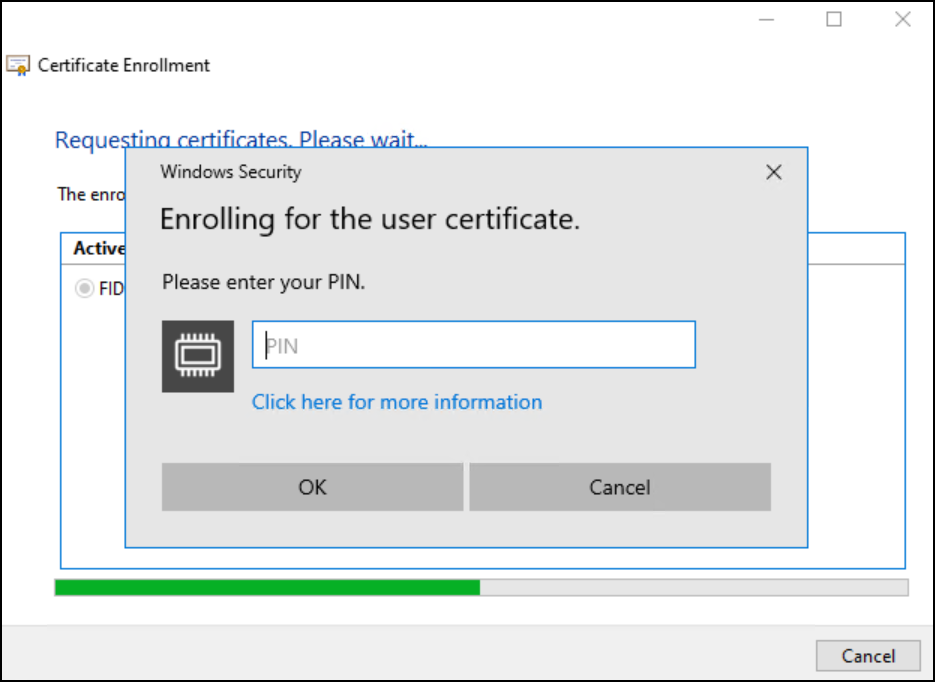
Enter FIDO2 PIN code:

Congratulations! If everything has been set up correctly, you should now be able to successfully log in using a FIDO2 key in a Windows environment.

Smart Card Removal Behavior
One last important setting you may want to configure is the Smart Card Removal Behavior to automatically lock the workstation. To achieve this, you'll need to do two things:
Group Policy Setting: Set the GPO (Group Policy Object) policy "Interactive logon: Smart card removal behavior" to the value "Lock Workstation." This policy determines what happens when the smart card is removed from the reader during an active session. Locking the workstation ensures that unauthorized access is prevented when the FIDO2 key is removed.
Service Startup: Set the startup type for the Windows service "Smart Card Removal Policy" to automatic. This service is responsible for enforcing the Smart Card Removal Behavior policy.
By implementing these settings, you enhance the security of your authentication process. When a user removes the FIDO2 key, the workstation will automatically lock, safeguarding sensitive data and ensuring that only authorized users can access the system.
Final thoughts
With these final configurations in place, your Windows environment is now equipped with a robust and modern authentication system that combines the benefits of FIDO2 keys with the security features of smart card technology.